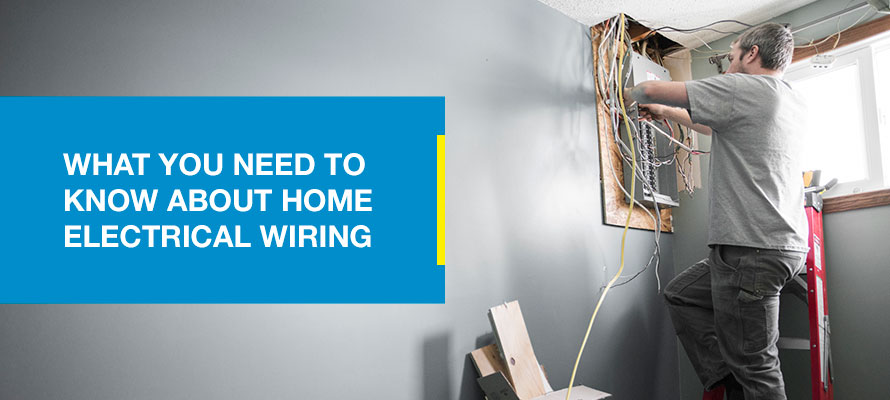
If you’re contemplating a DIY electrical wiring project, you need to be equipped with the right tools, parts, and safety practices. Below, we’ll cover the essential concepts in basic residential wiring, including home electrical wiring colors, types of electrical wires, and other practical information for home wiring.
Common Types of Wire Used in Home Electrical Wiring
Before getting into electrical wiring basics, it helps to understand the different electrical cable types, wires and cables. Although many people use them interchangeably, there are distinctions between the two:
- A cable is an assembly of multiple wires in one jacket.
- A wire is one of the bare or insulated conductors in a jacket.
Wires come in various sizes, with 12-gauge and 14-gauge most commonly found in homes. Larger appliances like central air units, electric dryers, electric water heaters and stoves will use 10-, 8- and sometimes 6-gauge wires.
If you want to add a new outlet to your home, you must use wires of the same gauge sizes as your existing wiring. To identify the gauge of the wire, remember that 12-gauge wire is about as thick as a nickel, and a 14-gauge wire is roughly as thick as a dime. You can also check the breaker for the circuit, and if it’s a 20-amp circuit, that means the associate wire must be 12-gauge or larger.
Identifying Cables by Numbers
Cables are classified using two numbers that are separated by a hyphen. The first number indicates the gauge of the conductor, and the second number indicates how many conductors are inside the cable.
For example, “14-2” on an electrical cable means the cable contains two 14-gauge conductors — one hot and one neutral. This cable also has a ground, which is a bare copper wire. Each conductor in a cable is color-coded, which tells its purpose in the circuit.
Color-Coding of Outer Sheath
The color of the outer sheath of a cable also indicates the gauge of the wire inside and the circuit’s amperage rating:
- White: Wire gauge of 14, circuit amperage of 15
- Yellow: Wire gauge of 12, circuit amperage of 20
- Orange: Wire gauge of 10, circuit amperage of 30
- Black: Wire gauge of 8 or 6, circuit amperage of 45 or 60
- Gray: This color refers to an underground cable. Since all underground feeder cable is colored gray, make sure to look at the labeling on the sheath for circuit and gauge specifics.
Another important thing to stress is that not all cables are color-coded. The practice of color-coding cable sheaths only started in 2001, and doing so remains voluntary. If your wiring is older, avoid assuming it complies with current color-coding codes. But the majority of manufacturers these days follow these standard codes.
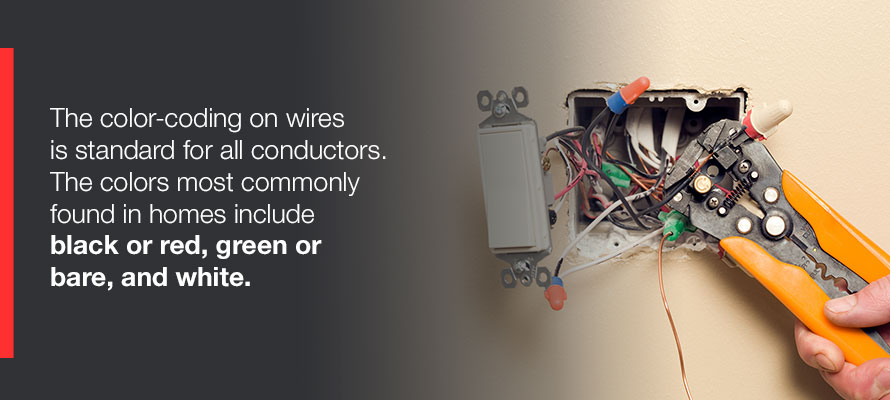
Color-Coding of Wires
The color-coding on wires is standard for all conductors. The colors most commonly found in homes include:
- Black or red: A black or red wire indicates hot wires, which carry current from a service panel to a device like a receptacle, switch, appliance, or light fixture. While some other colors are used for hot wires, they’re considerably less common.
- White: White wires are neutral wires. Neutral wires carry the current to the panel, thus completing the circuit.
- Green or bare: These qualities indicate a ground wire. If a ground fault occurs, this ground wire will provide a path for the fault current to go back to the panel, which will open the breaker or blow the fuse, cutting off electrical flow.
Common Electrical Wiring Tools
As is the case in almost all trades, electrical wiring can’t be done unless you have the proper equipment. These are the most essential tools for electricians, regardless of the kind of work they do:
- Pliers: A pair of pliers is perhaps the electrician’s most indispensable tool. There’s no single type of pliers that an electrician can use for all applications, so they must carry a variety. The most essential types include needle-nose pliers, which help electricians hold tiny fasteners, and side-cutting pliers, which help cut a wire to a specific length and crimp connectors. Tongue-and-groove pliers, also known as channel lock pliers, are useful for jobs involving conduits and pipes.
- Nut drivers and screwdrivers: Electricians require a number of screwdrivers able to handle any fastener head type, the most common of which are Phillips, slotted, and Torx. Electricians must also be prepared for heads that are less common, like square heads.
- Pipe reamers: An electrician depends on a pipe reamer to make the edges of cut conduit smoother so wires won’t get snagged on them.
- Wire strippers: Years ago, electricians would carry manual wire strippers that featured many slots for a variety of gauges. Now, electricians tend to carry an automatic wire stripper, a useful tool that adapts automatically to whatever gauge is fed into it.
- Fish tape: One of the most common jobs performed by electricians is routing wires through conduit and walls, and this job is only possible with fish tape. Fish tape generally consists of a narrow spring steel band or, if the job calls for nonconductive draw tapes, fiberglass.
- Fish poles: Fish poles are generally strong and light rods of fiberglass that electricians use to pull wiring through cable trays or suspended ceilings and under raised floors.
- Measuring tape: Electricians would be unable to do their job without measuring tools, which include a wooden six-foot rule for jobs in energized environments. They also often carry traditional metal band measuring tapes, although these days, they usually prefer laser measuring tools. These modern tools offer accuracy, speed, and memory, which allow them to store many measurements, and the ability to perform calculations.
- Labeler: The safest, most efficient job sites are clearly marked and well-labeled. For this reason, labelers are a useful tool for an electrician. A labeling machine able to print text, barcodes and basic graphics is an indispensable item for a number of common tasks. Electricians use labelers for labeling cables, wires, switches, panels, and other components.
- Drill: Regardless of the type of work an electrician does, they will need to use a power drill. Some electricians require more than one type. Cordless, low-voltage models are useful for fastening, and hammer drills are needed to work through concrete.
- Saw: Electricians need a wide variety of saws to do their jobs. One of the most versatile and popular saws is the handheld reciprocating saw, although a spiral saw, which uses a bit instead of a blade, is also a popular option. Sheetrock knives with stiff blades are also handy.
- Digital multimeter: Digital multimeters are another extremely useful tool for electricians. They tell an electrician whether power is present — which is critical for their safety — along with a number of things about a circuit. With this tool, electricians can read amperes and ohms, resistance and sometimes even capacitance, temperature, and inductance. It’s crucial that a digital multimeter is rated for the environment and voltage the electrician is working with.
- Non-contact voltage tester: Even though a multimeter can perform the same task, a non-contact voltage tester gives electricians a quick, easy way to determine whether a wire is live. These devices, which are the same shape and size as a pen, detect electrical fields without having to make contact.
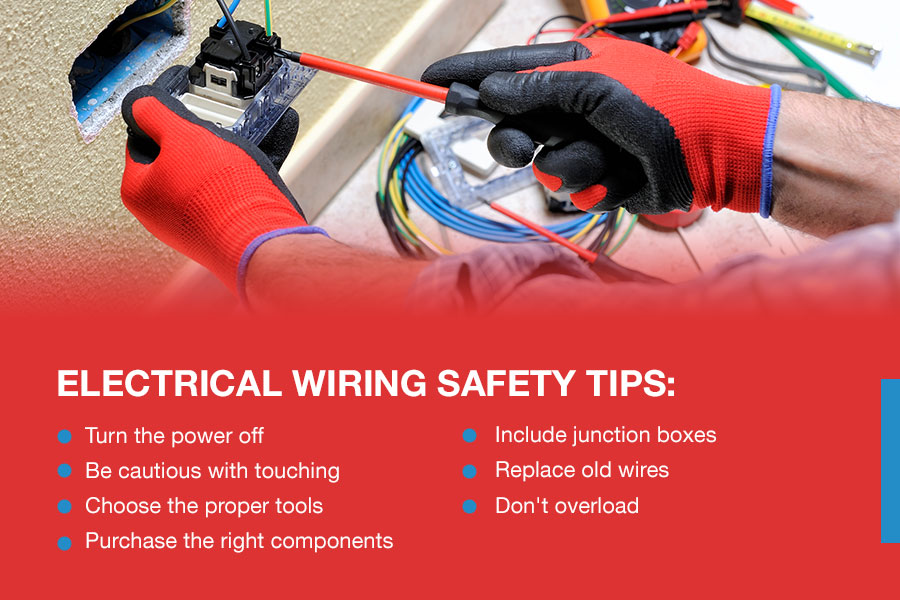
Electrical Wiring Safety Tips
Before undertaking a DIY wiring project, you should be well-versed in basic home electrical wiring and the recommended safety practices. If you fail to use the proper tools or take the right precautions, you could be putting yourself and your loved ones in danger. Some of the most common hazards include electrocution and fire. If you do not have full confidence in a DIY wiring job and undertaking this potentially dangerous task, we strongly advise you to work with a professional electrician.
Below is a list of essential electrical wire safety tips:
- Turn the power off: Be absolutely sure to cut the power at your breaker before you begin. Then, verify all wires are completely dead using a voltage tester before beginning work. You should also let everyone in your home know that you are doing electrical work. To ensure the circuit breaker remains off while you work, tape it into the off position.
- Be cautious with touching: Never touch gas or plumbing pipes when you’re working with electricity. They are commonly used for grounding electrical systems.
- Choose the proper tools: Before starting, ensure you have a game plan in terms of which switches, fixtures and outlets will be involved. Have all the tools you need, which include — but aren’t limited to — wire cutters, needle-nose pliers, wire and cable strippers, colored tape, fish tape, a continuity tester, a voltage tester, and an electric drill. It may be possible to rent some of this equipment from a hardware store in your area.
- Purchase the right components: If this project involves installing new receptacles, ensure the new receptacles match your home’s wiring. An AL-CU stamp indicates it can be used on both aluminum and copper wiring. Unmarked receptacles, or ones that show an AL with a slash through it, should be used only on copper wiring.
- Include junction boxes: Never splice together wires and hide them in a wall without a junction box. Accessible junction boxes should always be used for joining wires.
- Replace old wires: If your wiring is showing signs of fraying or deterioration, replace it.
- Don’t overload: An overloaded outlet or extension cord can cause a fire.
How to Test Electrical Wiring in Your Home
If your property is older and the wiring has never been replaced, this means your wiring and fuse box were installed during a time when electricity needs were much lower. We weren’t contact-charging phones or running laptops and computers, and most homes only had one television. If you live in a home with wiring not installed for 21st-century usage, you’ll want to check this out and possibly upgrade.
When testing your wiring, two tell-tale problems that your wiring should be upgraded are flickering lights and a switchboard that frequently trips. Even if you haven’t experienced either of these problems, your wiring may still need to be upgraded, which you can determine by testing it with a multimeter.
How to Test With a Multimeter
If you are inexperienced with using a multimeter or otherwise feel uncomfortable about this procedure, call a professional for assistance. Electricity is powerful, and if you don’t know what you’re doing, you may be risking serious injury or death.
When testing the wiring in your home, follow these steps:
- Connect the probes: First, connect the black probe to the multimeter’s common jack. You should then connect the red one to the jack labeled “AC voltage.”
- Set the multimeter mode: Set the mode of your multimeter to AC voltage. When setting the range, make sure it’s large enough to work for whatever you’re testing. In the US, the range should be set to at least 120 volts.
- Plug in the probes: Take the end of the black or common probe and insert it into the plug’s neutral slot. Then, take the red or positive probe into the plug’s hot slot.
- Wait for the reading: After a few seconds, the multimeter should provide you with a reading of the circuit’s voltage.
This process can be done from any of your home’s outlets, as this gives you a reading of the power throughout the home. The reading you should get is about 120 volts AC. If this isn’t the case, contact an electrician.
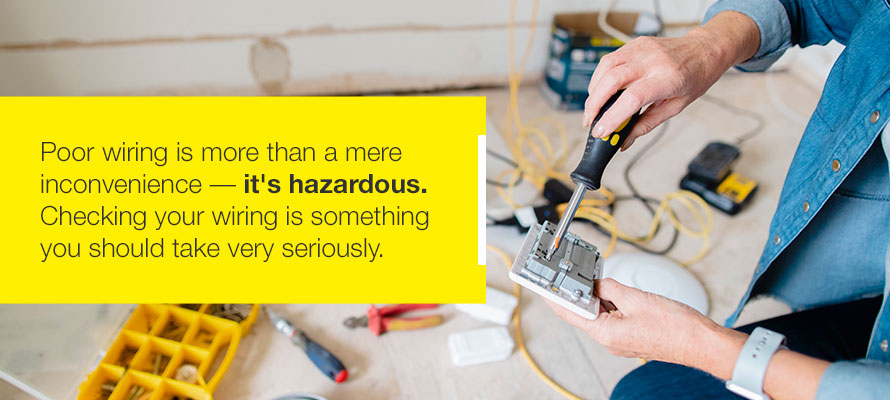
How to Check for Poor Wiring
Poor wiring is more than a mere inconvenience — it’s hazardous. Checking your wiring is something you should take very seriously.
There are a number of signs of poor wiring. These include:
- Ripped or frayed wiring
- Burnt power outlets
- Buzzing or flickering lights
If you notice any of the above, contact an electrician immediately.
Burnt Power Outlets
If your home has burnt power outlets or you detect a burning smell around your switches, something is overheating. If you notice either of these, contact an electrician immediately. If you continue using a circuit that’s overloaded, this may start a fire.
Overheating and burning smells are often caused by overloaded fuses or frayed, ripped, or inadequate wires. If this is the case in your home, part or all of your house will need to be rewired. Don’t use the light or power outlet in question until a professional electrician has inspected it and all necessary work has been completed.
Call the Professionals at Wiretech Company for Your Residential Wiring Needs
If you’re a Raleigh homeowner planning to finish off your basement, remodel a room, or build an addition, have the pros at Wiretech Company handle all the electrical wiring. When it comes to new wiring for home renovations, additions and remodeling in Raleigh, North Carolina, and beyond, Wiretech Company is the wiring pro you’ll want to call.
Our experts have years of experience working for some of the area’s biggest remodeling companies. We are also fully licensed and insured, so you can rest assured we will do our job with the highest levels of safety, competence and professionalism.
If you need an electrician for a residential wiring project, reach out to us using our inquiry form or by calling us at 919-847-1617.